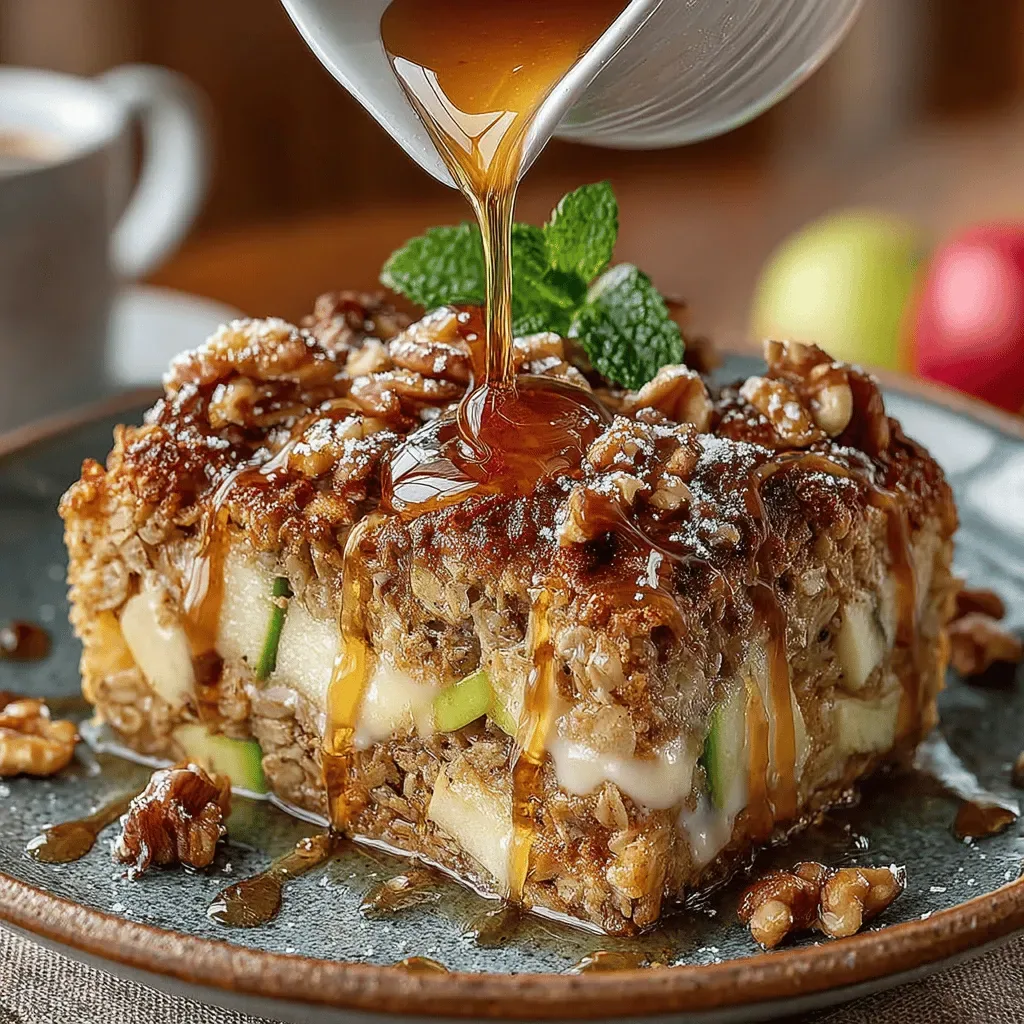
It was a crisp Saturday morning in late October when I first discovered the magic of maple‑kissed banana bread. The kitchen was still scented with the faint perfume of fallen leaves drifting in through the open window, and the golden sunlight painted the countertop in amber tones. I had just pulled a batch of fresh‑baked muffins from the oven, but the real star of the show was still hidden in a humble bowl, waiting for the perfect moment to rise. The moment you lift the lid, a cloud of fragrant steam hits you—warm, sweet, and unmistakably autumn, with a whisper of cinnamon that makes the heart flutter.
I remember the first bite: the tender crumb, the subtle crunch of a caramelized crust, and that deep, earthy sweetness that only pure maple syrup can deliver. It was as if the flavors of a forest walk, a ripe banana, and a drizzle of amber gold had decided to dance together in perfect harmony. That experience sparked a mission—to capture that moment and share it with anyone who craves a cozy, comforting treat that feels like a hug from the season itself. This isn’t just any banana bread; it’s a celebration of fall, a recipe that brings the kitchen alive with the sound of a spoon scraping the bowl and the sight of a golden loaf emerging from the oven.
But wait—there’s a secret trick that elevates this loaf from “delicious” to “irresistible,” and I’m not going to give it away just yet. Have you ever wondered why some banana breads turn out dense and gummy while others are airy and moist? The answer lies in a few precise choices that most home bakers overlook, and I’m about to reveal them step by step. Trust me, you’ll want to note every detail, because the difference is as striking as sunrise over a misty forest.
Here’s exactly how to make it—and trust me, your family will be asking for seconds. Grab your favorite mixing bowl, preheat that oven, and get ready to create a loaf that will become a staple in your fall gatherings. The journey from ripe bananas to a fragrant, maple‑infused masterpiece is just a few steps away, and I’m thrilled to guide you through each one.
🌟 Why This Recipe Works
- Flavor Depth: The combination of ripe bananas and pure maple syrup creates a layered sweetness that’s richer than sugar alone, delivering caramel notes that echo the season’s harvest.
- Moisture Balance: Using both butter and eggs ensures the crumb stays tender and moist, while the banana puree adds natural humidity without making the loaf soggy.
- Texture Harmony: Baking soda reacts with the banana’s natural acidity, giving the bread a light, airy lift that contrasts beautifully with a crisp, buttery crust.
- Ease of Preparation: All ingredients are pantry staples, and the method requires only one bowl, making cleanup a breeze and encouraging even novice bakers to try.
- Time Efficiency: With a prep time of just fifteen minutes and a bake time of thirty minutes, you can have a fresh, warm loaf ready while the house fills with its inviting aroma.
- Versatility: The base recipe welcomes endless tweaks—add nuts, chocolate chips, or a swirl of cream cheese—making it adaptable for any palate.
- Nutrition Boost: Bananas bring potassium and fiber, while maple syrup offers antioxidants, giving the loaf a modest health edge over typical sugary desserts.
- Crowd‑Pleasing Factor: Its warm spices and sweet maple glaze appeal to both kids and adults, turning it into a go‑to treat for holiday gatherings, brunches, or simple snack times.
🥗 Ingredients Breakdown
The Foundation: Flour, Butter, and Eggs
All‑purpose flour provides the structural backbone of the bread, creating a tender yet sturdy crumb that holds the fruit and spices together. When measuring, spoon the flour into your cup and level it off to avoid a dense loaf—this simple trick keeps the texture light. Unsalted butter, softened to room temperature, adds richness without the risk of over‑salting; it also helps the top develop that beautiful golden crust we all love. Eggs act as the binding agent, incorporating air into the batter and contributing to a moist interior that doesn’t dry out during baking.
Aromatics & Spices: Bananas, Maple Syrup, and Cinnamon
Ripe bananas are the heart of this recipe; their natural sugars and soft texture eliminate the need for excessive added sweeteners and ensure a moist crumb. Choose bananas that are heavily speckled and almost mushy—they’re the sweetest and most flavorful. Pure maple syrup, with its smoky caramel undertones, replaces ordinary sugar, delivering a depth of flavor that feels both rustic and refined. Ground cinnamon adds warmth, echoing the cozy feelings of fall and balancing the sweetness of the bananas and maple.
The Secret Weapons: Baking Soda and Salt
Baking soda is the unsung hero that reacts with the banana’s natural acidity, creating tiny bubbles that lift the batter and give the bread its airy texture. Without it, the loaf would be flat and heavy, lacking that signature rise. A pinch of salt may seem trivial, but it amplifies every other flavor, ensuring the sweetness doesn’t become cloying and the spices shine through.
Finishing Touches: Cinnamon Sugar Mixture
The cinnamon sugar mixture is sprinkled on top before baking, forming a sweet, crunchy crust that crackles as it bakes. This simple glaze adds a delightful contrast to the soft interior, offering a caramelized finish that’s both visually appealing and palate‑pleasing. You can customize the ratio of sugar to cinnamon to suit your taste—more sugar for extra crunch, more cinnamon for a spicier kick.
When selecting ingredients, always opt for the highest quality you can find. Look for bananas that are fully ripe, a maple syrup that is 100% pure (no additives), and butter that is fresh and creamy. If you need a dairy‑free version, a good quality plant‑based butter will work just as well, though the flavor profile will shift slightly. With your ingredients prepped and ready, let's get cooking. Here’s where the fun really begins...

🍳 Step-by-Step Instructions
Preheat your oven to 350°F (175°C) and lightly grease a 9×5‑inch loaf pan with butter or non‑stick spray. While the oven warms, line the pan with parchment paper for an easy release later; the paper also helps the crust develop a uniform golden color. The kitchen will start to fill with a faint buttery aroma as the pan warms—trust this as a good sign that the heat is distributing evenly.
Now, take a large mixing bowl and mash the three ripe bananas with a fork or potato masher until they’re almost liquid, leaving a few small chunks for texture. The mash should be fragrant, with a deep, sweet scent that hints at the caramel notes you’ll taste later. If you’re in a hurry, a hand‑held immersion blender can speed up the process without over‑mixing.
In a separate small saucepan, melt the softened unsalted butter over low heat, just until it turns liquid and begins to bubble gently. Remove the pan from the heat and stir in the pure maple syrup, letting the mixture combine into a glossy, amber‑colored glaze. This step is where the magic begins; the butter carries the maple’s flavor deep into the batter, creating a cohesive sweetness.
💡 Pro Tip: Let the butter‑maple mixture cool for a minute before adding it to the bananas—this prevents the eggs from cooking prematurely.Add the warm butter‑maple blend to the mashed bananas, whisking until fully incorporated. You’ll notice the batter turning a richer, deeper hue, and the scent will become unmistakably autumnal.
In a third bowl, whisk together the all‑purpose flour, baking soda, ground cinnamon, and a pinch of salt. The dry ingredients should be evenly distributed; a quick sift can help break up any clumps and ensure the cinnamon is evenly woven throughout the flour.
Create a well in the center of the dry mixture, then crack in the two large eggs. Beat the eggs lightly before folding them into the flour mixture, allowing the batter to come together gradually. This method prevents over‑mixing, which could develop gluten and make the bread tough.
Now combine the wet and dry components. Pour the banana‑maple mixture into the flour bowl, stirring gently with a rubber spatula until just combined. The batter should look slightly lumpy; this is intentional, as over‑stirring would lead to a dense loaf.
⚠️ Common Mistake: Mixing until the batter is smooth can over‑develop gluten, resulting in a rubbery texture. Stop as soon as you see no more streaks of flour.Give the batter a final gentle fold, then pour it into the prepared loaf pan, smoothing the top with the back of a spoon. The batter should settle evenly, and you’ll notice a faint sheen from the maple syrup—this is a good sign of a moist crumb.
In a small bowl, combine granulated sugar with a generous pinch of ground cinnamon to create the cinnamon‑sugar topping. Sprinkle this mixture evenly over the surface of the batter, ensuring every corner receives a dusting. As the loaf bakes, the sugar will caramelize, forming a crackly, golden crust that contrasts beautifully with the soft interior.
Place the loaf pan in the center of the preheated oven and bake for 30‑35 minutes. Around the 20‑minute mark, rotate the pan 180 degrees to promote even browning—this small adjustment prevents one side from becoming overly dark.
You’ll know the bread is done when a toothpick inserted into the center emerges with just a few moist crumbs, and the top has turned a deep amber with a faint crackle. The kitchen will now be saturated with the intoxicating aroma of maple, banana, and cinnamon—if you can’t resist, go ahead, take a taste—your nose will guide you.
Remove the loaf from the oven and let it rest in the pan for ten minutes. This short cooling period allows the crumb to set, making it easier to lift out without breaking. While the loaf cools, the residual heat continues to caramelize the topping, enhancing that sweet crunch.
After ten minutes, run a thin knife around the edges of the pan, then gently invert the loaf onto a cooling rack. Let it cool completely before slicing; a warm slice will be soft and crumbly, while a fully cooled slice offers a firm, sliceable texture with a crisp crust.
Now, here's where the fun really begins: serve the bread warm with a pat of butter, a drizzle of extra maple syrup, or even a dollop of whipped cream for an indulgent treat. The best part? The leftovers stay moist for days, and you can reheat a slice in the microwave for a quick snack.
And there you have it! But before you dig in, let me share some tips that will take this from great to absolutely unforgettable. These insights come from years of tweaking, tasting, and sometimes, a few kitchen mishaps that taught me the value of precision and patience.
🔐 Expert Tips for Perfect Results
The Taste Test Trick
Before you fold the wet and dry ingredients together, give the banana‑maple mixture a quick taste. If it feels a touch shy on sweetness, add an extra teaspoon of maple syrup; this small adjustment can balance the natural tartness of the bananas and ensure the final loaf isn’t under‑sweetened. I once served a batch that was a tad bland, and the feedback was immediate—people love that deep caramel note, so trust your palate.
Why Resting Time Matters More Than You Think
Allowing the batter to rest for five minutes after combining wet and dry ingredients lets the flour fully hydrate, resulting in a tender crumb. This short pause also gives the baking soda time to react, creating a subtle lift that keeps the loaf light. I discovered this by accident when I rushed through a recipe and ended up with a dense texture; a brief rest changed everything.
The Seasoning Secret Pros Won’t Tell You
A pinch of sea salt on top of the cinnamon‑sugar mixture just before baking amplifies the caramel notes and adds a subtle crunch. Professional bakers often sprinkle flaky sea salt on desserts for that surprising pop of flavor, and you can replicate the effect at home with just a pinch. The result is a more complex taste that feels upscale without extra effort.
The Perfect Crumb Test
When the loaf is fully baked, gently press the top with your fingertip; it should spring back slowly, indicating a moist interior. If the surface feels overly firm, the loaf may be over‑baked, and the crumb could dry out. In my early attempts, I left the loaf in the oven too long, resulting in a tough crust—now I always rely on the spring‑back test.
Storing for Maximum Freshness
Wrap the cooled loaf tightly in parchment paper followed by a layer of foil before storing it at room temperature. This double‑layer method locks in moisture while protecting the crust from becoming too soft. I’ve found that a loaf stored this way stays fresh for up to four days, and the flavor actually deepens as the maple continues to infuse the banana.
Freezing Without Compromise
Slice the bread before freezing, then arrange the slices in a single layer on a baking sheet to flash‑freeze. Once solid, transfer the slices to a zip‑top bag. When you’re ready to enjoy, simply toast the slice for a few minutes; the crust will re‑crisp, and the interior will melt back into a soft, maple‑laden delight. This technique saved me a lot of waste during holiday seasons when the loaf was too popular to finish in one go.
🌈 Delicious Variations to Try
One of my favorite things about this recipe is how versatile it is. Here are some twists I've tried and loved:
Nutty Crunch Delight
Fold in a half‑cup of chopped toasted pecans or walnuts into the batter before baking. The nuts add a buttery crunch that pairs beautifully with the caramelized maple glaze, creating a textural contrast that makes each bite exciting.
Chocolate‑Banana Swirl
Melt a quarter‑cup of dark chocolate and swirl it through the batter just before adding the cinnamon‑sugar topping. The bittersweet chocolate balances the sweetness of the maple and bananas, turning the loaf into a decadent dessert that feels like a holiday treat.
Apple‑Maple Fusion
Replace one of the bananas with a grated, peeled apple and add an extra teaspoon of cinnamon. The apple’s subtle tartness brightens the flavor profile, while the extra cinnamon deepens the autumnal vibe, making the loaf reminiscent of a warm apple pie.
Spiced Pumpkin Boost
Add a quarter‑cup of pumpkin puree and a pinch of nutmeg to the wet mixture. This variation turns the loaf into a pumpkin‑banana hybrid, perfect for Thanksgiving tables where pumpkin is already a star.
Cranberry‑Maple Burst
Stir in a half‑cup of dried cranberries soaked in warm maple syrup for ten minutes. The cranberries introduce a tart pop that cuts through the sweetness, and the extra syrup ensures the loaf stays moist.
Vegan Velvet
Swap the butter for coconut oil and replace the eggs with flaxseed “egg” (1 tablespoon ground flaxseed mixed with 3 tablespoons water, let sit for five minutes). The result is a vegan‑friendly loaf that still boasts a rich, buttery mouthfeel and the same comforting flavors.
📦 Storage & Reheating Tips
Refrigerator Storage
Allow the loaf to cool completely, then wrap it tightly in parchment paper followed by a layer of aluminum foil. Store it in an airtight container in the refrigerator for up to four days. The parchment helps retain moisture while the foil prevents the crust from absorbing other odors.
Freezing Instructions
Slice the loaf into 1‑inch pieces, place the slices on a baking sheet, and freeze until solid. Transfer the frozen slices to a zip‑top freezer bag, removing as much air as possible. The loaf can be frozen for up to three months; when ready, reheat directly from frozen in a toaster oven or microwave.
Reheating Methods
To reheat a slice without drying it out, lightly brush it with a splash of maple syrup or a drizzle of melted butter, then warm it in a preheated 300°F oven for eight minutes. For a quicker fix, microwave the slice for 20‑30 seconds, covered with a damp paper towel to retain moisture. The trick to reheating without drying it out? A splash of maple syrup adds moisture and reinforces the flavor.