
Decadent No-Bake Chocolate Cheesecake Cups: A Sweet Indulgence for Chocolate Lovers
Indulge in the rich and creamy delight of Decadent No-Bake Chocolate Cheesecake Cups, a perfect dessert for those who can’t resist chocolate. This recipe seamlessly combines the smoothness of cheesecake with the satisfying crunch of a chocolatey crust, offering a delightful experience in each spoonful. What makes this treat even more appealing is its no-bake nature, making it an ideal choice for warm days or when you want to whip up something sweet without the fuss of an oven. In this article, we will delve into the ingredients and detailed steps to create these delightful dessert cups, explore the rich history of cheesecake, and uncover why no-bake recipes have become a beloved choice among home bakers.
Understanding No-Bake Desserts
No-bake desserts are precisely what they sound like: delicious treats that require no baking at all. These desserts have gained immense popularity for various reasons. Firstly, they are incredibly quick to prepare, often taking less than an hour from start to finish. This makes them perfect for spontaneous gatherings or last-minute cravings. Additionally, no-bake recipes typically require minimal kitchen equipment, meaning fewer dishes to wash afterward. Most importantly, by skipping the oven, you can keep your kitchen cool, making them a great option during hot weather.
Among the category of no-bake treats, no-bake cheesecakes stand out due to their versatility. Cheesecake flavors can range from classic vanilla to exotic fruit variations, but the chocolate version reigns supreme for chocolate lovers. The creamy texture of the cheesecake filling, combined with the contrasting crunch of the crust, creates a symphony of flavors and textures that is hard to resist. The ease of preparation, along with the ability to make them ahead of time, makes no-bake cheesecakes a favorite dessert among home bakers and party hosts alike.
Ingredients Breakdown
To create the perfect Decadent No-Bake Chocolate Cheesecake Cups, it’s essential to understand the role of each ingredient involved.
Essential Ingredients for the Crust
The foundation of this dessert starts with the crust, which provides both flavor and texture. The essential ingredients include:
1. Chocolate Graham Cracker Crumbs: These crumbs are the backbone of the crust, offering a rich chocolate flavor that complements the cheesecake filling. They also provide a delightful crunch, enhancing the overall eating experience.
2. Cocoa Powder: Adding cocoa powder intensifies the chocolate flavor of the crust. It contributes to the depth of taste, ensuring that every bite is packed with chocolatey goodness.
3. Granulated Sugar: A touch of sweetness is crucial to balance the flavors in the crust. Granulated sugar not only sweetens the mixture but also helps to bind the crust together.
4. Unsalted Butter: Butter acts as a binding agent, holding the crust ingredients together. Its richness adds an extra layer of flavor, making the crust irresistible.
Each of these ingredients plays a vital role in achieving the perfect texture and flavor for the crust, setting the stage for the creamy cheesecake filling that follows.
The Cheesecake Filling Components
Moving on to the star of the show, the cheesecake filling, which is what truly makes these cups decadent. The key ingredients for the filling include:
1. Cream Cheese: The primary base for cheesecake, cream cheese provides a rich and creamy texture that is essential for achieving that classic cheesecake taste. It’s important to use softened cream cheese for easy mixing.
2. Powdered Sugar: This ingredient adds sweetness to the filling without altering its texture. The fine texture of powdered sugar blends seamlessly into the cream cheese, resulting in a smooth filling.
3. Heavy Whipping Cream: This is what gives the cheesecake its light and airy texture. Whipping the cream until it forms stiff peaks adds volume and richness, creating a luscious mouthfeel.
4. Vanilla Extract: A splash of vanilla extract enhances the overall flavor profile, adding a warm and aromatic note that complements the chocolate.
5. Semi-Sweet Chocolate Chips: Melted chocolate chips are folded into the cream cheese mixture, providing a deep chocolate flavor and contributing to the creamy texture of the filling.
Each ingredient in the cheesecake filling plays a crucial role in creating a rich and smooth consistency that melts in your mouth.
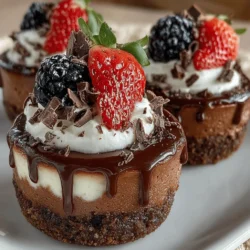
Toppings that Elevate the Dessert
To elevate your Decadent No-Bake Chocolate Cheesecake Cups, consider adding a few delicious toppings. These not only enhance the visual appeal but also add extra layers of flavor and texture:
1. Whipped Cream: A dollop of freshly whipped cream on top adds a light and airy element that contrasts beautifully with the dense cheesecake filling.
2. Chocolate Shavings: For an elegant touch, sprinkle chocolate shavings on top. They add a sophisticated look and an extra hint of chocolate.
3. Cocoa Powder: A dusting of cocoa powder can enhance the chocolate flavor and provide a beautiful contrast against the creamy filling.
4. Fresh Berries: For those who enjoy a fruity twist, fresh berries like raspberries or strawberries can provide a burst of freshness that balances the richness of the cheesecake.
5. Customization Options: Feel free to get creative with toppings based on your preferences. Crushed nuts, caramel drizzle, or even a sprinkle of sea salt can all add unique flavors and textures to your dessert.
Step-by-Step Instructions for Preparation
Now that we’ve covered the background and ingredients, it’s time to dive into the step-by-step instructions for preparing these delicious Decadent No-Bake Chocolate Cheesecake Cups. Here, we’ll outline the initial steps to get you started on this delightful dessert journey.
1. Prepare the Crust: In a mixing bowl, combine the chocolate graham cracker crumbs, cocoa powder, granulated sugar, and melted unsalted butter. Mix until the crumbs are evenly coated and the mixture resembles wet sand.
2. Assemble the Cups: Spoon the crust mixture into the bottom of individual serving cups or bowls, pressing down firmly to create an even layer. This will form the base of your cheesecake cups.
3. Make the Filling: In a separate bowl, beat the softened cream cheese until smooth. Gradually add the powdered sugar and continue mixing until well combined. In another bowl, whip the heavy cream until stiff peaks form, then gently fold it into the cream cheese mixture.
4. Incorporate the Chocolate: Melt the semi-sweet chocolate chips in a microwave or over a double boiler, allowing them to cool slightly. Fold the melted chocolate into the cream cheese mixture until fully incorporated, creating a rich and creamy filling.
5. Fill the Cups: Spoon the cheesecake filling over the prepared crusts in each cup, smoothing the tops with a spatula.
These initial steps set the stage for a delightful dessert that you can impress your family and friends with, all without the need for baking. Stay tuned for the next part of the article, where we will cover the final touches, including chilling time, serving suggestions, and additional tips to perfect your No-Bake Chocolate Cheesecake Cups.
Preparing the Crust
To create the perfect base for your No-Bake Chocolate Cheesecake Cups, you need to combine the crust ingredients thoughtfully. Start with 1 ½ cups of graham cracker crumbs, which form the foundation of your crust. You can either crush the crackers yourself using a food processor or place them in a plastic bag and roll them with a rolling pin. Aim for a fine crumb texture for the best results.
Next, add in ⅓ cup of granulated sugar and ½ cup of melted unsalted butter to the graham cracker crumbs. The melted butter acts as a binding agent, helping your crust hold together. Mix these ingredients in a medium-sized bowl until the mixture resembles wet sand. The key is to ensure that all crumbs are evenly coated with butter and sugar.
Tips for Pressing the Crust Mixture Evenly into the Cups
Once your crust mixture is ready, it’s time to press it into your serving cups. Use a tablespoon to scoop a portion of the mixture into each cup. Begin by pressing the mixture down firmly with your fingers. To achieve an even layer, use the bottom of a flat measuring cup or a small glass to compact the crust evenly across the bottom of each cup. Make sure to press down sufficiently to avoid a crumbly crust once set. Additionally, you can slightly raise the crust along the edges of the cup to give a nice visual effect once filled.
Creating the Cheesecake Filling
Now that your crust is set, it’s time to prepare the decadent cheesecake filling. Start with 16 ounces of room temperature cream cheese for a smooth texture. In a large mixing bowl, beat the cream cheese using an electric mixer on medium speed until it’s creamy and free of lumps. This should take about 2-3 minutes.
Next, gradually add in ½ cup of granulated sugar and 1 teaspoon of pure vanilla extract. Continue mixing until well combined. It’s essential to scrape down the sides of the bowl to ensure everything is mixed thoroughly.
In a separate bowl, whip 1 cup of heavy whipping cream until stiff peaks form. This is crucial as the whipped cream provides lightness to your cheesecake filling. Gently fold the whipped cream into the cream cheese mixture using a spatula. Take care not to deflate the whipped cream; this folding technique keeps your filling light and airy.
Importance of Folding in Melted Chocolate and Vanilla for Flavor Depth
To achieve that rich chocolate flavor, melt 8 ounces of semi-sweet chocolate. Allow it to cool slightly before folding it into the cream cheese filling. Ensure the chocolate isn’t too hot, as this could melt the whipped cream and compromise the texture. The folding technique is essential here; add the melted chocolate in a few small additions, gently incorporating it until no streaks remain. This melding of flavors creates a depth in your cheesecake that is absolutely irresistible.
Assembling the Cheesecake Cups
With your crust and filling prepared, it’s time to assemble the cheesecake cups. Start by using a piping bag or a zip-top bag with the corner snipped off to fill each cup with the cheesecake mixture. This method allows for more control and a cleaner presentation. Begin by adding a generous layer of the filling over the crust.
Tips for Ensuring an Even Distribution and Smooth Finish
To ensure an even distribution of the filling, start from the edges of the cup, gently squeezing the filling from the center towards the edges. Once filled, smooth the top of the cheesecake with a spatula or the back of a spoon for a polished look. If you want to create a little texture, you can swirl the top slightly with a spatula for visual appeal.
Once all cups are filled, place them in the refrigerator to chill. The cheesecake needs time to set properly, allowing the flavors to meld and the texture to firm up.
Chilling and Setting
Chilling is a crucial step for your No-Bake Chocolate Cheesecake Cups. Place the assembled cups in the refrigerator and allow them to chill for a minimum of 4 hours, although overnight is preferable for optimal results. Refrigeration not only helps the cheesecake set but also enhances the flavors, making it taste even better.
Recommended Chilling Time for Best Results
For best results, aim to chill the cups for at least 6 hours. This longer chilling time allows the filling to firm up beautifully, making it easy to scoop and enjoy. Serving them too soon may result in a softer filling that could lose its shape.
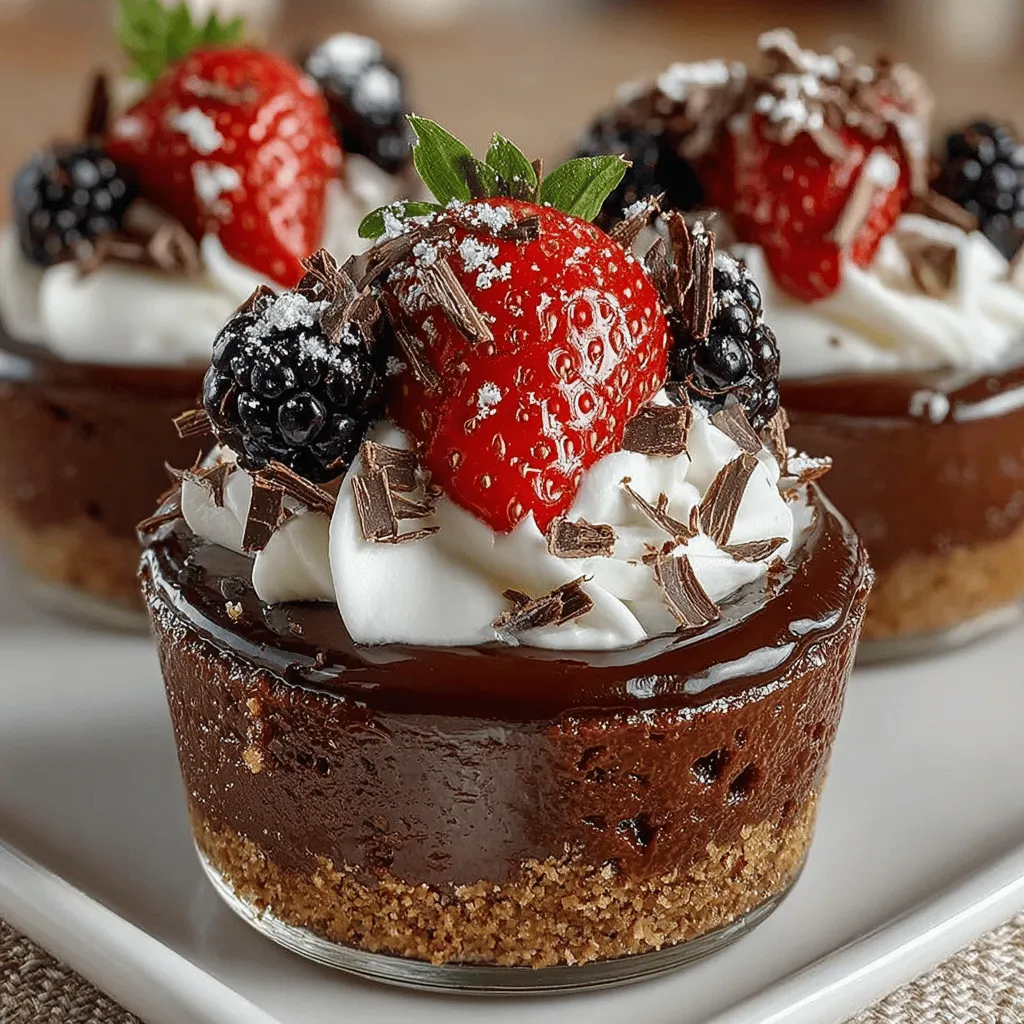
Serving Suggestions
Enhancing the presentation of your No-Bake Chocolate Cheesecake Cups can elevate the dessert experience for your guests. Here are some creative ways to serve and present your delectable treats.
Presentation Techniques
Top your cheesecake cups with a dollop of freshly whipped cream for a touch of elegance. To make it even more visually appealing, consider using a piping bag to create swirls or peaks of whipped cream. You can also sprinkle some finely grated chocolate or cocoa powder on top for an extra chocolatey kick.
For an added touch, garnish with fresh berries such as raspberries or strawberries. The tartness of the berries provides a lovely contrast to the rich chocolate flavors. Alternatively, you can use chocolate shavings, crushed nuts, or a drizzle of chocolate sauce to enhance the appearance and taste.
These cheesecake cups can be served at a variety of occasions, from family gatherings to intimate dinners or even larger parties. Their individual serving size makes them perfect for buffets or dessert tables, allowing guests to enjoy a sweet treat without the hassle of cutting slices.
Pairing Suggestions
To complement the rich flavors of your No-Bake Chocolate Cheesecake Cups, consider serving them with beverages that balance the sweetness. A nice cup of freshly brewed coffee or a glass of dessert wine pairs beautifully with the chocolate, enhancing the overall tasting experience.
For those who prefer non-alcoholic options, a rich hot chocolate or a creamy vanilla latte can be a fantastic accompaniment. If you want to serve something lighter, consider a refreshing mint tea or sparkling water with a slice of lemon to cleanse the palate.
In terms of side dishes, a light fruit salad can balance the richness of the cheesecake. The freshness of the fruit adds a delightful contrast and keeps the dessert from feeling too heavy.
Conclusion
Decadent No-Bake Chocolate Cheesecake Cups offer a luxurious dessert experience without the complexity of traditional baking. With their rich chocolate flavor and silky filling, these cups are sure to impress any guest or satisfy a sweet craving. The combination of easy preparation and delightful results makes this recipe a must-try for both novice and experienced cooks alike.
Whether enjoyed on a warm summer evening or served at a special occasion, these cheesecake cups are a testament to the joy of no-bake desserts. Create lasting memories with friends and family, savoring each bite of these heavenly treats, and make sure to share your experience with others who appreciate the art of dessert making.