
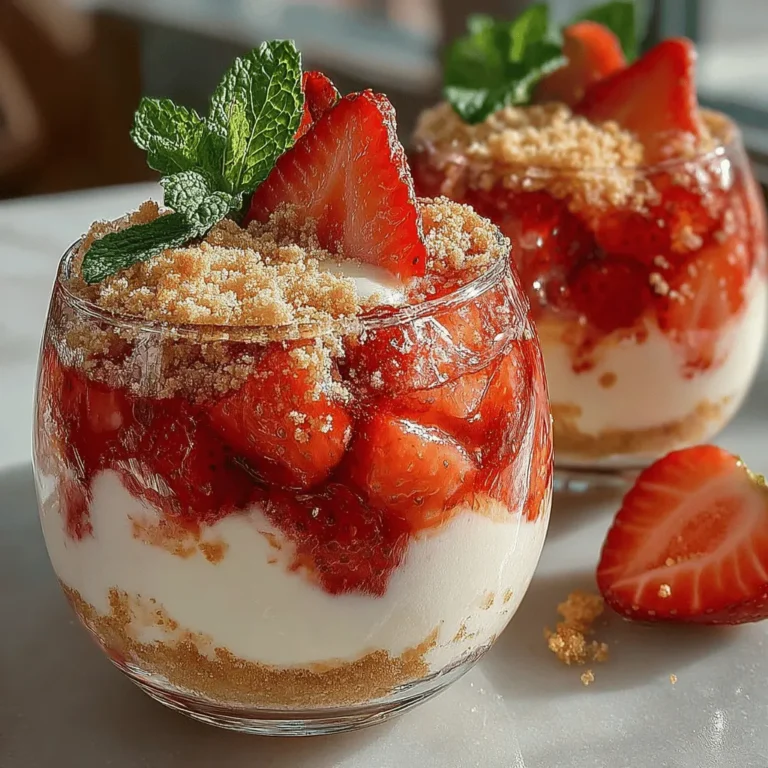
Strawberry Dream Cups: A Refreshing No-Bake Dessert Recipe
As temperatures rise and the days grow longer, the allure of no-bake desserts becomes increasingly appealing. These delightful treats offer a way to indulge in sweet flavors without the added heat of an oven, making them perfect for warm-weather gatherings, picnics, or simply enjoying at home with family. One such dessert that encapsulates the essence of summer is the Strawberry Dream Cups. This recipe celebrates the vibrant, fresh flavors of strawberries combined with a rich, creamy texture that makes each bite feel like a luxurious treat.
The allure of Strawberry Dream Cups lies not only in their refreshing taste but also in their simplicity and quick preparation time. With just a handful of ingredients and minimal effort, you can whip up a stunning dessert that is sure to impress your guests. Whether you’re hosting a dinner party or looking for a sweet finish to a family meal, these cups are a delightful way to satisfy your sweet tooth without spending hours in the kitchen.
The Allure of Strawberries
Strawberries are not just a delicious fruit; they are also packed with nutritional benefits that make them a smart choice for a dessert ingredient. These bright red berries are rich in antioxidants, particularly vitamin C, which is essential for a healthy immune system. Additionally, strawberries contain important vitamins and minerals, including manganese, folate, and potassium. They are also low in calories, making them a guilt-free indulgence.
The peak season for strawberries typically falls between late spring and early summer, which is when they are at their sweetest and most flavorful. During this time, you can find them at local farmers’ markets, where they are often picked fresh that morning. This availability not only supports local agriculture but also ensures that you are using the freshest ingredients possible in your Strawberry Dream Cups.
Beyond their nutritional value, strawberries hold a significant place in cultural history. They have been enjoyed for centuries, with records of their cultivation dating back to ancient Rome. In various cultures, strawberries symbolize love and passion, making them a popular choice for romantic occasions. Their vibrant color and delicious flavor have made them a beloved fruit around the world, and they are often featured in desserts, salads, and beverages.
Ingredients Breakdown
To create the perfect Strawberry Dream Cups, you’ll need a few essential ingredients that come together to enhance the natural flavors of the strawberries. Here’s a breakdown of each ingredient and its role in this delightful dessert:
– Fresh Strawberries: The star of the show, fresh strawberries bring natural sweetness, vibrant color, and a refreshing flavor that is essential for this recipe. Their juiciness adds a wonderful texture to the dessert.
– Granulated Sugar: This ingredient enhances the sweetness of the strawberries while drawing out their juices, creating a luscious filling for the cups. The sugar also helps to balance the acidity of the strawberries, making the flavors pop.
– Heavy Whipping Cream: The heavy cream provides a rich and creamy texture that is crucial for the dessert’s indulgent quality. When whipped, it adds volume and lightness, creating a cloud-like consistency that complements the strawberries beautifully.
– Sweetened Condensed Milk: This ingredient adds smoothness and a rich sweetness to the dessert. It blends seamlessly with the whipped cream to create a luscious filling that binds all the flavors together.
– Vanilla Extract: A splash of vanilla extract adds depth and complexity to the dessert, elevating the overall flavor profile. It complements the sweetness of the strawberries and the richness of the cream, resulting in a harmonious blend.
– Lemon Juice: To balance out the sweetness, a dash of lemon juice introduces a subtle acidity that brightens the flavors. It enhances the fruitiness of the strawberries and adds a refreshing zing to the dessert.
– Crushed Graham Crackers: These provide a delightful crunch and texture to the cups, offering a contrast to the creamy filling. The buttery flavor of the graham crackers complements the sweetness of the strawberries perfectly.
– Fresh Mint Leaves: Used for garnish, fresh mint leaves add a pop of color and a refreshing aroma that enhances the overall presentation of the dessert. They also provide a subtle herbal note that pairs well with the strawberries.
Step-by-Step Instructions
Now that you have a better understanding of the ingredients and their roles, let’s dive into the first step of preparing your Strawberry Dream Cups: preparing the strawberries. This initial step is crucial for ensuring that the strawberries shine in your dessert.
Preparing the Strawberries
1. Choose Ripe Strawberries: Start by selecting ripe, fresh strawberries. Look for vibrant red berries that are firm to the touch and free of blemishes. The sweetness of your dessert will heavily depend on the quality of the strawberries used.
2. Wash Thoroughly: Gently rinse the strawberries under cool running water to remove any dirt or pesticides. It’s best to wash them just before you’re ready to use them to prevent them from becoming mushy.
3. Hull the Strawberries: Using a sharp knife or a strawberry huller, carefully remove the green tops and the white core of the strawberries. This process will ensure that you’re left with only the juicy, flavorful fruit.
4. Slice or Chop: Depending on your preference, you can either slice the strawberries into thin pieces or chop them into smaller chunks. If you opt for slices, they will create a beautiful layering effect in your dessert cups. Chopped strawberries will incorporate more easily into the filling.
5. Sweeten the Strawberries: Place the prepared strawberries in a mixing bowl and sprinkle them with granulated sugar. Toss gently to coat the strawberries evenly. Allow them to sit for about 10-15 minutes, during which time they will release their natural juices and become even sweeter.
Once you have prepared the strawberries, you’ll be ready to move on to the next steps of assembling your Strawberry Dream Cups. This initial preparation sets the stage for a dessert that not only looks stunning but also tastes incredible, capturing the essence of summer in every bite. Stay tuned for the upcoming sections where we will delve into the remaining steps of creating this delightful no-bake treat!
Importance of Hulling and Dicing Strawberries Correctly
The foundation of any great strawberry dessert lies in the quality of the strawberries used. Hulling and dicing strawberries correctly is crucial for both flavor and presentation. To hull strawberries, use a sharp paring knife or a specialized huller to remove the leafy green top and the white core effectively. This process not only improves the aesthetic appeal but also ensures that every bite is filled with the sweet, juicy goodness of the fruit.
Once hulled, it’s time to dice the strawberries into even pieces. Aim for uniformity in size, ideally 1/4 to 1/2 inch cubes. This ensures that they macerate evenly and that the strawberries are easy to enjoy in each cup. Properly cut strawberries will also enhance the overall texture of the dish, making each layer visually appealing and easy to scoop with a spoon.
Macerating Strawberries for Enhanced Flavor
Macerating strawberries is a simple yet transformative process that enhances their natural sweetness and flavor. To begin, place the diced strawberries in a medium bowl and sprinkle them with sugar. The general rule of thumb is about one tablespoon of sugar for every cup of strawberries, but feel free to adjust based on your sweetness preference.
As the sugar sits on the strawberries, it draws out their juices, creating a syrupy mixture. Let the strawberries macerate for at least 15 to 30 minutes at room temperature. During this time, the sugar will dissolve, and the strawberries will soften, resulting in a deliciously sweet and juicy filling that will elevate your Strawberry Dream Cups to a whole new level.
Creating the Strawberry Mixture
With your freshly macerated strawberries ready, it’s time to create the strawberry mixture that will form the base of your dessert. In a separate bowl, combine the macerated strawberries with a touch of lemon juice. This addition not only brightens the flavor but also balances the sweetness from the sugar. Gently stir to combine, taking care not to break up the strawberries too much.
The key to this step is to ensure that the strawberry mixture remains chunky and vibrant. This texture will add a delightful mouthfeel when layered in the cups, contrasting beautifully with the creamy whipped topping you’ll prepare next.
The Importance of Folding Ingredients Gently
When working with delicate ingredients like whipped cream, folding is the preferred method to combine mixtures without deflating the air that has been incorporated. This technique is crucial for maintaining the light and airy texture that is characteristic of Strawberry Dream Cups.
To fold, use a spatula to scoop under the mixture and lift it over the top, turning the bowl as you go. Repeat this motion until the ingredients are just combined. The goal is to see swirls of the white whipped cream and the pink strawberry mixture without overmixing, which can lead to a dense final product.
Whipping the Cream
Achieving the perfect whipped cream is an art that can greatly enhance your dessert. Start by chilling your mixing bowl and beaters in the refrigerator for about 15 minutes before whipping the cream. This ensures that the cream stays cool and whips up to its fullest potential.
Use heavy cream or whipping cream for the best results, as the higher fat content allows for better stabilization. Pour the chilled cream into the bowl and begin mixing on medium speed. Gradually increase the speed as the cream thickens. When soft peaks form, add a tablespoon of powdered sugar and a splash of vanilla extract for sweetness and flavor. Continue whipping until you achieve stiff peaks — this means the whipped cream holds its shape when you pull the beaters out.
Combining the Mixtures
Once your whipped cream is ready, it’s time to combine it with the strawberry mixture. Using the gentle folding technique mentioned earlier, incorporate the whipped cream into the strawberry base. The goal is to create a light and airy mixture that still showcases the beautiful strawberries.
Be careful to fold just until combined; overmixing can cause the whipped cream to lose its structure, resulting in a denser dessert. The final mixture should be fluffy and speckled with pieces of strawberry, ready to be layered into your serving cups.
Assembling the Cups
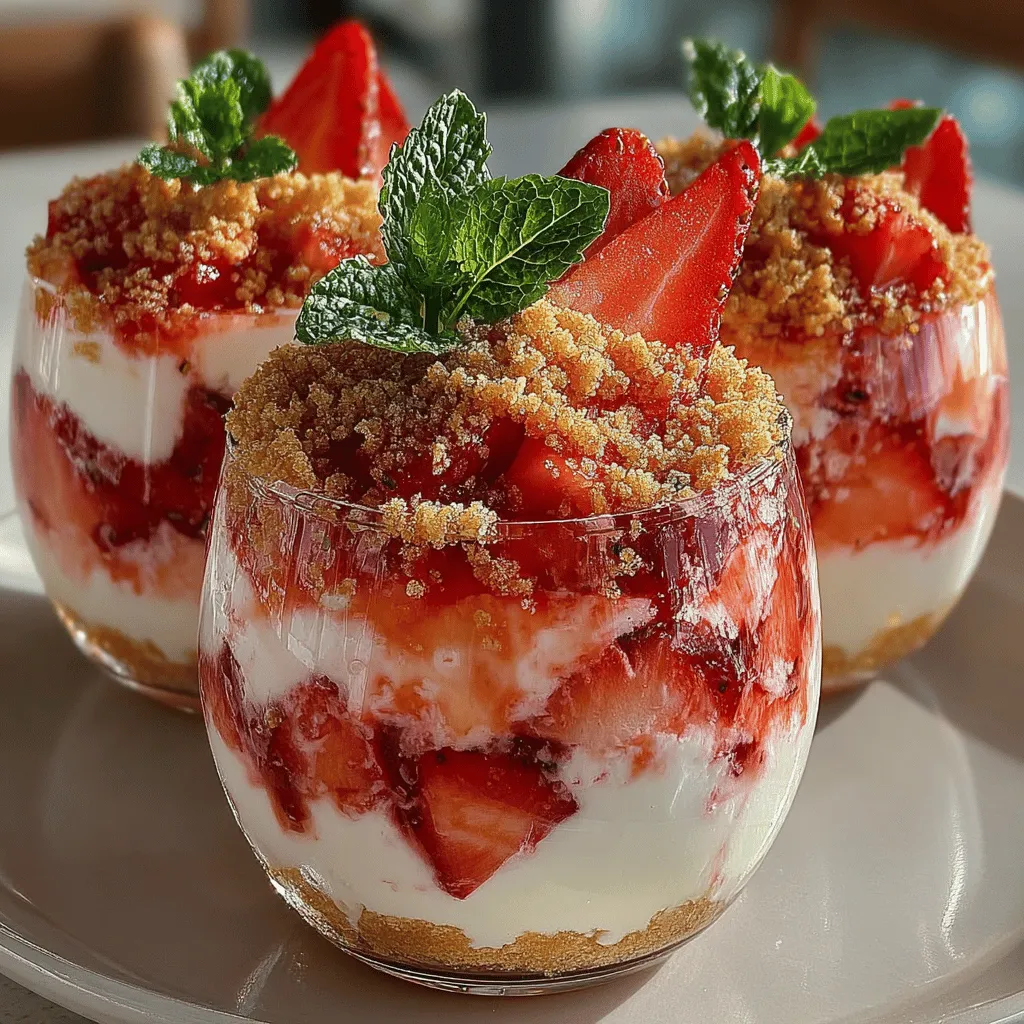
Presentation is key when it comes to desserts, especially with something as visually appealing as Strawberry Dream Cups. Begin by preparing your serving cups or bowls. Clear glass cups work great as they allow the colorful layers to shine through.
Start with a spoonful of the strawberry mixture at the bottom, followed by a layer of whipped cream. Repeat the layers until you reach the top of the cups, finishing with a dollop of whipped cream. For a touch of elegance, you can even add a few whole strawberries on top for garnish.
Portion control is important, especially if you’re serving a crowd. Aim for about 1/2 cup servings to keep the dessert light and allow guests to indulge without feeling overwhelmed.
Chilling for Perfection
After assembling your Strawberry Dream Cups, it’s essential to chill them in the refrigerator for at least 1-2 hours before serving. Chilling allows the flavors to meld together and the whipped cream to set, creating a more cohesive dessert. This resting time also helps the strawberry juices to seep into the whipped cream, enhancing the flavor profile even further.
Serving Suggestions
When it comes to serving your Strawberry Dream Cups, garnishing is an important step that can elevate the overall presentation. Consider adding a sprig of fresh mint on top for a pop of color and a hint of freshness. Alternatively, a drizzle of chocolate sauce or a sprinkle of crushed graham crackers can add a nice touch.
To enhance the dining experience, pair your Strawberry Dream Cups with a refreshing beverage like iced tea or sparkling lemonade. For a more indulgent option, consider serving them alongside a scoop of vanilla ice cream or a slice of pound cake for added richness.
The Perfect Setting for Strawberry Dream Cups
Strawberry Dream Cups are a versatile dessert that shines at various occasions. They are perfect for summer parties, picnics, and family gatherings, bringing a refreshing touch to any event. Their vibrant colors and delicious flavors make them a favorite among guests of all ages.
Additionally, they can be easily transported, making them ideal for potlucks or gatherings where you want to impress with minimal effort. Consider serving them as a light dessert option after a hearty meal, or as a sweet treat during afternoon tea.
Complementary Dishes and Beverages
To create a well-rounded menu, consider pairing your Strawberry Dream Cups with complementary dishes. Light salads with citrus vinaigrette, grilled meats, or even a charcuterie board with cheeses and nuts can provide a delightful contrast to the sweetness of the cups.
Beverage pairings can also enhance the experience. A crisp Sauvignon Blanc or a fruity rosé wine can complement the flavors beautifully. For a non-alcoholic option, a homemade strawberry lemonade or a refreshing mint-infused iced tea would be excellent choices.
Nutritional Information
Understanding the nutritional content of your Strawberry Dream Cups can help in managing dietary choices. Here’s a breakdown of the nutritional information per serving, based on an average serving size of 1/2 cup:
– Calories: 210
– Total Fat: 12g
– Saturated Fat: 7g
– Cholesterol: 40mg
– Sodium: 45mg
– Total Carbohydrates: 24g
– Sugars: 17g
– Protein: 2g
– Vitamin C: 35% of the Daily Value
– Calcium: 4% of the Daily Value
This nutritional profile highlights the balance of indulgence and fruitiness that characterizes the Strawberry Dream Cups, making them a delightful treat to enjoy.
Conclusion
In summary, Strawberry Dream Cups offer a delightful and refreshing dessert experience that celebrates the sweetness of summer strawberries. With their layered textures and vibrant flavors, they are not only simple to prepare but also a treat that everyone will love. Embracing seasonal fruits in your desserts not only enhances flavors but also showcases the best of what nature has to offer.
So, gather your ingredients and get ready to indulge in a light and airy dessert that captures the essence of summer. Whether for a special occasion or just a sweet treat at home, these Strawberry Dream Cups are sure to impress and satisfy. Enjoy the sweetness of strawberries and the joy of sharing this delightful dessert with friends and family!
