
Indulge in Choco-Banana Bliss Pops: A Guilt-Free Dessert Delight
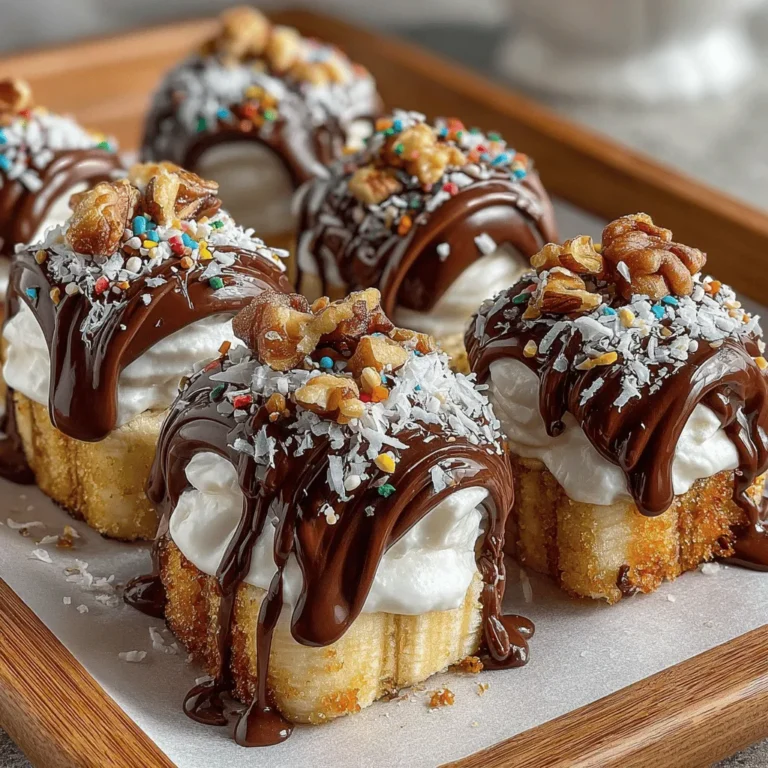
As the sun shines brighter and warmer days beckon, it’s the perfect time to indulge in refreshing treats that satisfy your sweet cravings without the guilt. Enter Choco-Banana Bliss Pops—an enticing fusion of flavors and textures that will delight your taste buds while keeping your health goals in check. This delightful recipe showcases the natural sweetness of ripe bananas, the creamy goodness of Greek yogurt, and the rich decadence of dark chocolate, making it an ideal dessert for both kids and adults alike. Whether you’re hosting a backyard gathering, planning a fun family activity, or simply seeking a nourishing snack, these pops are easy to prepare and promise to bring smiles all around.
Understanding the Ingredients
To truly appreciate the Choco-Banana Bliss Pops, it’s essential to understand the key ingredients that contribute to both their flavor and nutritional profile. Each element works harmoniously to create a dessert that’s not only delicious but also packed with health benefits.
The Star Ingredient: Bananas
Bananas are the star of this recipe, offering a natural sweetness that serves as the perfect base for your pops. Not only are they delicious, but they also boast an impressive nutritional profile. Rich in potassium, vitamin C, and vitamin B6, bananas support heart health, aid in digestion, and provide a quick source of energy, making them a favorite among athletes and health-conscious individuals alike.
When selecting bananas for your Choco-Banana Bliss Pops, look for ones that are ripe but not overripe. Ideally, they should have a few brown spots—this indicates optimal sweetness and flavor. Avoid bananas that are too green, as they can be starchy and less enjoyable when frozen.
The Creamy Layer: Greek Yogurt
Next up is Greek yogurt, which provides a creamy layer that enhances the texture of your pops. Unlike regular yogurt, Greek yogurt is strained to remove whey, resulting in a thicker consistency and higher protein content. This makes it a fantastic choice for a dessert that is both satisfying and nutritious. The probiotics found in Greek yogurt also contribute to gut health, making these pops a smart choice for a guilt-free treat.
For added versatility, Greek yogurt comes in various flavors, allowing you to customize your pops. Vanilla, honey, or even fruit-infused options can add an extra layer of appeal to your dessert. Choose unsweetened varieties to maintain control over sugar content, or opt for flavored versions if you prefer a sweeter taste.
The Sweet Coating: Dark Chocolate
No dessert is complete without a touch of chocolate, and in this recipe, dark chocolate plays a pivotal role. Renowned for its health benefits, dark chocolate is rich in antioxidants and can support heart health by improving blood flow and lowering blood pressure. Additionally, it contains less sugar than milk chocolate, making it a more wholesome option for your pops.
When choosing dark chocolate for coating, aim for products with at least 70% cocoa content to maximize health benefits. If you have dietary restrictions, there are also dairy-free and vegan chocolate options available, ensuring that everyone can enjoy these delicious treats.
Crunchy Additions: Nuts and Coconut
To elevate the Choco-Banana Bliss Pops even further, consider adding crunchy toppings like chopped nuts or shredded coconut. Nuts such as almonds, walnuts, or pecans not only provide a delightful crunch but also deliver healthy fats, protein, and fiber. These additions can help keep you feeling full and satisfied while adding an extra layer of texture to your dessert.
Shredded coconut is another fantastic option that enhances both the flavor and appearance of your pops. Toasted coconut can add a delightful nuttiness and crunch, while unsweetened varieties maintain the health-conscious aspect of this treat. Together, nuts and coconut create a satisfying contrast to the creamy yogurt and sweet banana, making each bite a delightful experience.
Preparation Steps for Choco-Banana Bliss Pops
Creating your Choco-Banana Bliss Pops is a straightforward process that involves a few simple steps. Once you gather your ingredients, you’ll be ready to make this delightful dessert in no time.
Preparing the Bananas
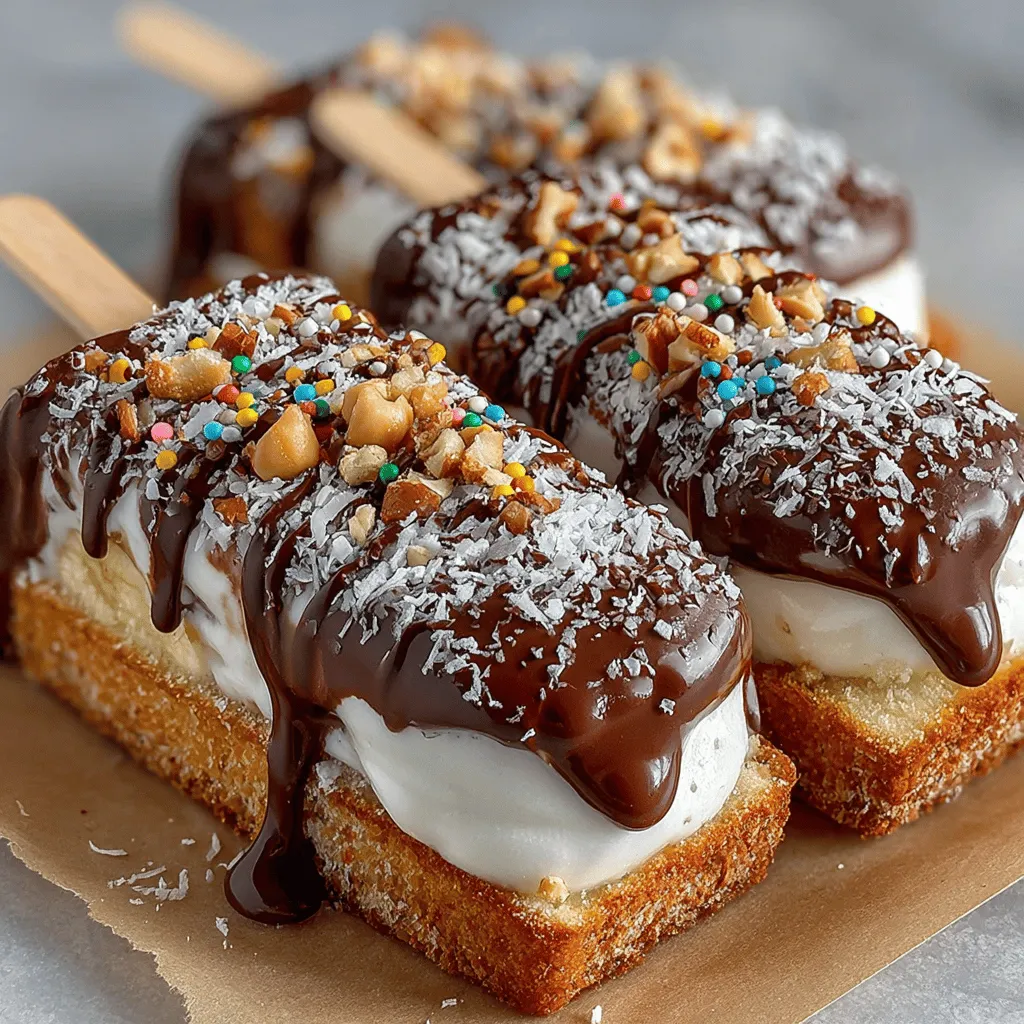
Start by peeling the bananas and cutting them into halves or thirds, depending on the size of your popsicle sticks and how long you want your treats to be. Ensure each piece is of uniform size for even freezing. To secure the popsicle sticks, gently insert them into the cut end of each banana piece. This step is crucial, as it allows for easy handling and dipping later on.
Once your bananas are prepared, place them on a parchment-lined baking sheet, making sure they are spaced apart to prevent sticking. Pop the tray into the freezer for about 30 minutes, allowing the bananas to firm up. This initial freezing step will make the yogurt coating adhere better and ensure a smoother finish.
Creating the Yogurt Coating
While the bananas are chilling, it’s time to prepare the yogurt coating. In a mixing bowl, combine your Greek yogurt with a sweetener of your choice, such as honey, maple syrup, or agave nectar, if you prefer a sweeter taste. Whisk the mixture until smooth and creamy, ensuring there are no lumps. If you wish to add flavorings, this is the perfect time to stir in vanilla extract or a dash of cinnamon for an extra layer of taste.
Once your yogurt mixture is ready, take the frozen banana pieces from the freezer. Dip each banana into the yogurt coating, ensuring it is evenly covered. A gentle swirl motion can help ensure that the yogurt adheres well to the banana. If you’d like to add toppings like nuts or shredded coconut, sprinkle them over the yogurt-covered bananas before placing them back on the parchment-lined tray.
Dipping and Freezing Process
After the bananas are coated, it’s time for the final freeze. Place the yogurt-covered bananas back in the freezer for at least 2 hours, or until they are completely frozen. This step is essential for achieving that perfect pop texture.
If you’re feeling adventurous, melt your dark chocolate in a microwave-safe bowl or over a double boiler. Once melted, dip the frozen yogurt-coated bananas into the chocolate for an added layer of richness. Allow any excess chocolate to drip off before returning them to the parchment-lined tray. For an extra touch, you can sprinkle some chopped nuts or coconut over the chocolate coating before it sets.
The Choco-Banana Bliss Pops are now ready to freeze one final time. Allow them to sit in the freezer for an additional hour to ensure the chocolate coating hardens perfectly.
With just a few simple steps, you will have transformed basic ingredients into a delectable treat that is sure to become a favorite in your household. As the pops freeze, the anticipation builds for the moment you can enjoy this guilt-free indulgence on a warm summer day.
How to Properly Freeze for the Best Results
Achieving the perfect consistency for your Choco-Banana Bliss Pops starts with proper freezing techniques. Freezing not only solidifies the pops but also enhances their flavor and texture.
Final Freezing Techniques
To ensure your pops are perfectly set, follow these steps:
1. Initial Freeze: After assembling your Choco-Banana Bliss Pops, place them upright in a sturdy container or a specially designed popsicle mold. This will prevent them from tipping over and losing shape. Allow them to freeze for at least 1 to 2 hours.
2. Check for Firmness: To check if they are ready, gently press the side of a pop. If it feels solid and firm without any give, you’re ready for the next step.
3. Long-Term Storage: For optimal texture, aim to freeze your pops for at least 4 to 6 hours, or overnight if possible. This ensures they are thoroughly frozen and won’t melt too quickly when served.
4. Storage: If you plan to store your pops for future enjoyment, wrap each one in plastic wrap or place them in an airtight container. This prevents freezer burn and preserves their flavor. Stored properly, they can last up to 2 weeks in the freezer.
Melting the Chocolate
Melting chocolate is a critical step in creating your Choco-Banana Bliss Pops. Follow these techniques to achieve the perfect melt without burning.
Techniques for Melting Chocolate Without Burning
1. Double Boiler Method: Fill a medium-sized pot with water and bring it to a simmer. Place a heatproof bowl on top of the pot, ensuring it doesn’t touch the water. Add your chocolate to the bowl and stir occasionally until melted and smooth. This gentle heat will prevent burning.
2. Microwave Method: Place chopped chocolate in a microwave-safe bowl. Heat in 30-second intervals, stirring between each interval. This method is quick but requires careful attention to avoid overheating. When the chocolate is mostly melted, continue stirring until fully smooth.
Tips for Achieving a Smooth Consistency with Coconut Oil
Adding coconut oil to your melted chocolate can enhance its texture, making it easier to coat your pops. Here’s how to do it effectively:
– Ratio: Use about 1 tablespoon of coconut oil for every 1 cup of chocolate. This will help create a silky smooth consistency that coats your pops evenly.
– Mixing: Stir the coconut oil into the melted chocolate until fully combined. This not only adds a delightful flavor but also helps the chocolate remain glossy after cooling.
Decorating the Pops
The fun doesn’t stop at just chocolate coating; decorating your Choco-Banana Bliss Pops can make them even more appetizing.
Suggestions for Nut and Coconut Mixtures
Consider rolling your pops in a mixture of chopped nuts and shredded coconut after dipping them in chocolate for added texture and flavor. Here are some ideas:
– Chopped Nuts: Almonds, walnuts, and pistachios provide a delicious crunch and can enhance the nutritional value of your pops.
– Coconut Flakes: Unsweetened shredded coconut adds a tropical flair and complements the banana flavor beautifully.
Creative Ideas for Decorating to Enhance Visual Appeal
Get creative with your decorations! Here are some additional ideas to make your pops visually enticing:
– Drizzle: Use a contrasting chocolate color (like white chocolate) to drizzle over the top for an elegant look.
– Sprinkles: Rainbow sprinkles or edible glitter can add a fun touch, especially for kids’ snacks.
– Dried Fruit: Small pieces of dried fruit, like cranberries or apricots, can add color and natural sweetness to your pops.
Freezing and Serving the Pops
Understanding the final steps to ensure your pops are perfectly set is crucial for the best experience.
Recommended Freezing Times for Optimal Texture
For optimal texture, aim to freeze your Choco-Banana Bliss Pops for a minimum of 4 to 6 hours. This duration allows the pops to become firm enough to hold their shape when served.
How to Store Pops for Future Enjoyment
Once your pops are frozen, store them in an airtight container or wrap each one individually in plastic wrap to prevent freezer burn. They can be kept for up to 2 weeks in the freezer, ensuring you have a healthy treat on hand whenever you crave something sweet.
Serving Suggestions
Presentation can elevate your Choco-Banana Bliss Pops from simple snacks to a delightful dessert.
Ideas for Presentation
– Serve on a Platter: Arrange your pops on a colorful platter, adding fresh fruit or mint leaves for garnish.
– Use Popsicle Sticks: For a fun touch, use decorative popsicle sticks. You can even personalize them with washi tape or markers.
Pairing with Other Healthy Snacks or Beverages
Consider pairing your pops with other healthy options for a complete snack spread:
– Yogurt: Serve with a side of Greek yogurt for dipping or as a complementary flavor.
– Fresh Fruit: Pair with sliced strawberries or a fruit salad for a refreshing contrast.
– Smoothies: A green smoothie or a berry smoothie can be a great beverage companion to your Choco-Banana Bliss Pops, enhancing the overall healthy theme.
The Health Benefits of Choco-Banana Bliss Pops
Choco-Banana Bliss Pops are not only delicious but also a healthier alternative to traditional desserts. Here’s why they stand out nutritionally.
Low in Added Sugars
One of the most significant benefits of these pops is their reduced sugar content compared to commercial popsicles:
– Comparison of Sugar Content: Many store-bought pops are loaded with added sugars and synthetic ingredients. In contrast, these pops derive their sweetness from natural sources like ripe bananas and yogurt.
– Natural Sweetness from Fruits and Yogurt: Bananas are naturally sweet and provide a creamy texture, while yogurt adds a tangy flavor without the need for excess sugar.
Nutrient-Rich Ingredients
The ingredients in your Choco-Banana Bliss Pops contribute to a well-rounded snack option:
– Vitamins and Minerals: Bananas are rich in potassium, vitamin C, and vitamin B6. Yogurt adds calcium and probiotics, promoting digestive health.
– Balance of Carbohydrates, Proteins, and Fats: This recipe offers a balanced mix of healthy carbohydrates from the fruit, protein from yogurt, and healthy fats from nuts and coconut oil, making it a satisfying snack.
A Fun Way to Encourage Healthy Eating
Engaging children in the kitchen can cultivate a love for healthy eating:
– Inspiring Healthier Snack Choices: Making these pops together can show children that healthy snacks can be enjoyable and fun to create.
– Engaging Kids in the Kitchen to Promote Healthy Habits: Involve kids in every step—from selecting ingredients to decorating the pops. This hands-on approach fosters a positive relationship with food.
Conclusion
Choco-Banana Bliss Pops are not just a delightful treat; they are a wholesome dessert option that combines flavor and nutrition. With easy-to-follow steps and customizable ingredients, these pops can cater to various dietary preferences while satisfying your sweet tooth. Enjoy the creamy, chocolatey goodness of these pops, knowing you’re indulging in a guilt-free dessert that everyone will love. By making these treats, you are not only creating a delicious snack but also instilling healthy habits that can last a lifetime. So gather your ingredients, get creative with your decorations, and enjoy these delightful pops that are perfect for any occasion!
