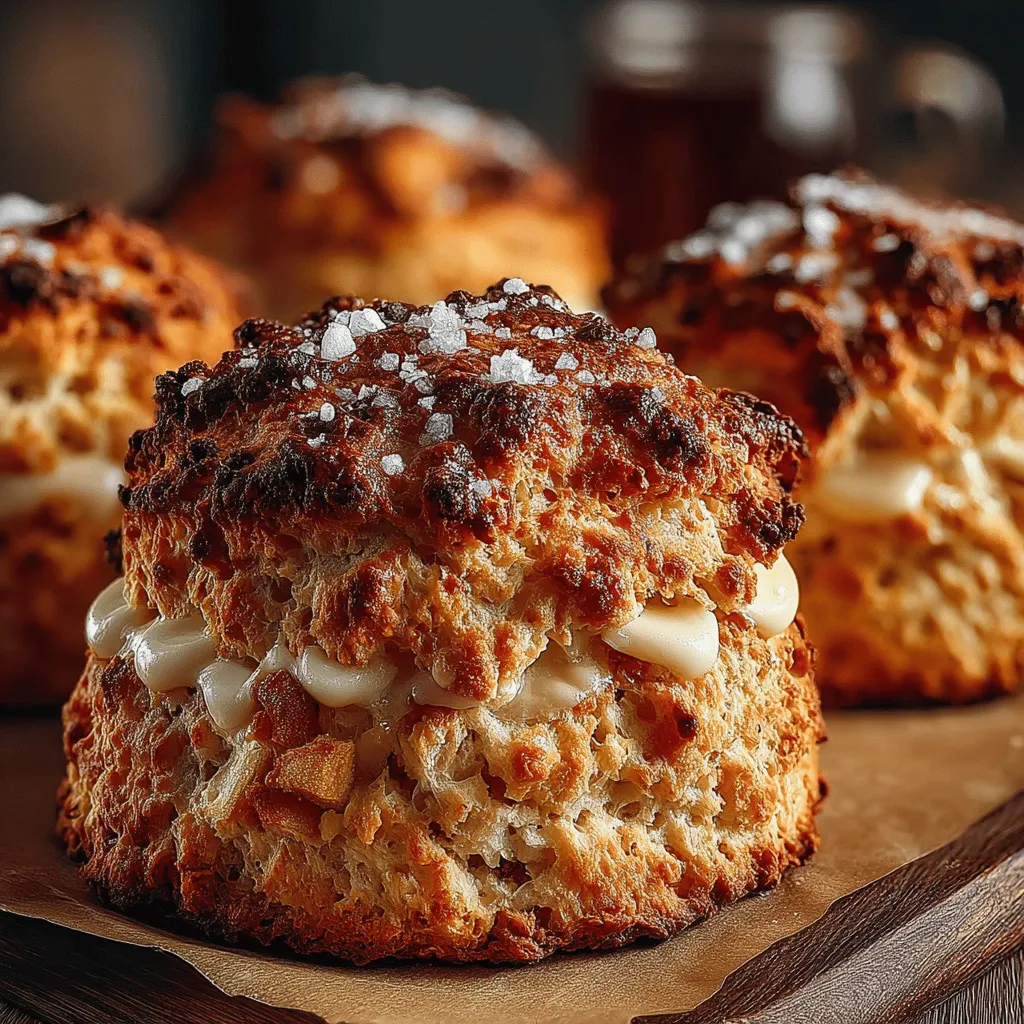
Heavenly Apple Cinnamon Scones Recipe: Your Guide to Perfectly Baked Delights
Introduction
Scones have long been a staple of British tea time, serving as a delightful accompaniment to steaming cups of tea. Their popularity has transcended borders, making them a cherished treat in kitchens worldwide. Renowned for their flaky texture and comforting flavors, scones can be enjoyed plain or with a plethora of sweet and savory additions. Among the vast array of scone recipes, Heavenly Apple Cinnamon Scones stand out as a delightful fusion of warm spices and fresh ingredients. This recipe not only captures the essence of traditional scones but also infuses it with the crispness of apples and the aromatic allure of cinnamon, making them perfect for breakfast, brunch, or an afternoon snack.
Understanding the Appeal of Apple Cinnamon Scones
The appeal of Apple Cinnamon Scones lies in their harmonious flavor profile. The sweetness of apples, combined with the warm, spicy notes of cinnamon, creates a comforting treat that evokes memories of cozy autumn afternoons. This delightful combination brings together both sweet and savory elements, making these scones versatile enough to pair with clotted cream or a simple pat of butter.
Moreover, incorporating apples into the scone recipe not only enhances the flavor but also provides nutritional benefits. Apples are a great source of dietary fiber, vitamin C, and various antioxidants, contributing to a wholesome snack option. When paired with nuts, such as walnuts or pecans, these scones gain additional nutritional value, including healthy fats and proteins. This makes Heavenly Apple Cinnamon Scones not just a delicious indulgence, but a more balanced choice for those looking to satisfy their cravings without sacrificing health.
Ingredients Breakdown for Heavenly Apple Cinnamon Scones
To create these delectable scones, you will need a selection of simple yet essential ingredients. Each component plays a crucial role in achieving the perfect texture and flavor balance.
1. All-Purpose Flour: This is the base of the scone, providing structure and bulk. The right flour ensures that the scones rise properly and maintain a light, flaky texture.
2. Granulated Sugar: A touch of sweetness helps to enhance the natural flavors of the apples and cinnamon. It also contributes to the golden-brown color of the scones when baked.
3. Baking Powder: This leavening agent is vital for achieving the fluffy texture. It helps the scones rise during baking, creating those desirable layers.
4. Salt: A small amount of salt balances the sweetness and enhances the overall flavor of the scones.
5. Ground Cinnamon: The star spice in this recipe, cinnamon adds warmth and depth, complementing the apples beautifully.
6. Unsalted Butter: The key to achieving flakiness, cold butter is cut into the dry ingredients, creating pockets of fat that will steam during baking and promote a tender texture.
7. Apples: Fresh apples, preferably a variety like Granny Smith or Honeycrisp, add moisture and a burst of flavor. They can be diced or grated, depending on your texture preference.
8. Nuts: Optional but recommended, nuts like walnuts or pecans add a satisfying crunch and nutty flavor that contrasts beautifully with the softness of the scones.
9. Milk or Cream: This liquid binds the mixture together, providing moisture and richness. You can use whole milk, buttermilk, or even a non-dairy alternative if desired.
10. Egg (optional): An egg can be added for richness and to help bind the ingredients together, although it can be omitted for a vegan version.
Understanding these ingredients will not only help you in preparing the scones but also allow you to experiment with substitutions if you have dietary preferences or restrictions. For instance, you can replace all-purpose flour with a gluten-free blend or use coconut sugar instead of granulated sugar for a healthier option.
Step-by-Step Instructions for Perfect Scones
Preheat the Oven: Setting the Stage for Baking
Before diving into the mixing and baking process, it’s crucial to preheat your oven. Setting it to 425°F (220°C) ensures that your scones will rise correctly and develop a beautiful golden color. Preheating also helps create a nice crust, enhancing the overall texture of the scones. While the oven is heating, prepare your baking sheet by lining it with parchment paper, which will prevent sticking and make for an easier cleanup.
Mixing Dry Ingredients: The Foundation of Flavor
Once your oven is preheated, start by gathering all your dry ingredients. In a large mixing bowl, combine the all-purpose flour, granulated sugar, baking powder, salt, and ground cinnamon. It’s essential to whisk these ingredients together thoroughly. Proper mixing ensures that the leavening agents are evenly distributed, which is vital for uniform rising and flavor throughout the scone. This step lays the foundation for the delightful taste and texture that you aim to achieve.
Cutting in Butter: The Key to Flakiness
Now comes the most critical step in creating flaky scones: cutting in the butter. Use cold, unsalted butter, and cut it into small cubes before adding it to the dry mixture. You can use a pastry cutter, two forks, or your fingers to work the butter into the flour mixture until it resembles coarse crumbs. The goal here is to keep some small pieces of butter visible, as these will melt during baking and create those desirable flaky layers. Avoid overmixing, as this can lead to tough scones.
Incorporating Apples and Nuts: Adding Texture and Taste
With the dry ingredients and butter ready, it’s time to fold in your prepared apples and nuts. If you’re using diced apples, ensure they’re small enough to distribute evenly throughout the dough. For a more uniform texture, consider grating the apples, which will integrate seamlessly into the mixture. If nuts are part of your recipe, finely chop them before adding. Gently fold the apples and nuts into the mixture, being careful not to overwork the dough. This step adds delightful texture and flavor, making each bite of the scone a heavenly experience.
Preparing Wet Ingredients: Binding the Mixture
The final step before shaping your scones is to prepare the wet ingredients. In a separate bowl, whisk together the milk (or cream) and egg if you are using one. Gradually add this mixture to the dry ingredients, stirring gently until everything is just combined. The dough should be slightly sticky but manageable. Avoid overmixing, as this can lead to dense scones. At this point, your dough is ready for shaping and baking, setting the stage for these delectable Heavenly Apple Cinnamon Scones that are sure to impress.
Stay tuned for the next part of this article, where we will guide you through the shaping, baking, and serving suggestions for these delightful scones.

The Purpose of Each Wet Ingredient
In baking scones, each wet ingredient plays a crucial role in achieving the desired texture and flavor. The primary wet ingredients in this apple cinnamon scone recipe include heavy cream, eggs, and melted butter.
– Heavy Cream: This rich dairy product adds moisture and fat to the scone dough, resulting in a tender crumb. It also contributes to the scones’ rich flavor profile.
– Eggs: Eggs act as a binding agent, helping to hold the scone together while providing structure. They also add a touch of richness and color to the final product.
– Melted Butter: Butter enhances the flavor and contributes to a flaky texture. It coats the flour particles, creating layers in the scone that lead to a light and airy final product.
Understanding the function of these ingredients will help you appreciate the science behind scone making and allows for adjustments if you choose to customize your scone recipe in the future.
Tips for Mixing Without Overworking the Dough
One of the most crucial aspects of baking scones is to avoid overworking the dough. Overmixing can lead to tough scones that lack the desired flakiness. Here are some tips to ensure that your dough remains tender:
– Use Cold Ingredients: Always use cold butter and heavy cream. Cold ingredients help create steam during baking, which contributes to a flaky texture.
– Mix by Hand: Instead of using a stand mixer, mix the dough by hand with a pastry cutter or your fingertips. This method allows you to control the mixing process better and reduces the risk of overworking the dough.
– Combine Gently: When adding the wet ingredients to the dry, stir just until combined. A few lumps are okay; they will bake out in the oven.
By following these tips, you can maintain the delicate structure of the dough, ensuring your scones turn out perfectly tender.
Combining the Mixtures: The Art of Scone Making
Best Practices for Mixing Dry and Wet Ingredients
When it comes to combining the dry and wet ingredients, the goal is to create a cohesive dough without overmixing. Here are the best practices to keep in mind:
1. Make a Well: Create a well in the center of the dry ingredients before adding the wet ingredients. This allows for easier mixing and helps incorporate the ingredients more uniformly.
2. Add Wet Ingredients Gradually: Pour the wet ingredients into the dry mixture gradually rather than all at once. This will help you gauge the moisture level and prevent adding too much liquid.
3. Use a Fork or Rubber Spatula: Use a fork or rubber spatula to gently fold the wet ingredients into the dry. This method minimizes gluten development and keeps the scones tender.
Recognizing the Signs of a Well-Mixed Dough
Knowing when your dough is well-mixed is vital for achieving the perfect scone. Look for the following signs:
– Moistened Ingredients: All dry ingredients should be moistened but not overly sticky. The dough should hold together but still have some lumps.
– No Dry Flour: Ensure there are no dry flour pockets left in the bowl. If you notice any, gently fold in a little more cream until they are incorporated.
– Soft and Slightly Sticky: The dough should be soft and slightly sticky to the touch, making it easier to shape without adding excessive flour.
Shaping the Dough: Crafting the Perfect Scone
Techniques for Kneading and Shaping
Once your dough is well-mixed, it’s time to shape it into scones. Here are some techniques you can use:
– Turn Out the Dough: Gently turn the dough onto a lightly floured surface. Avoid using too much flour to keep the dough from becoming tough.
– Lightly Knead: Gently knead the dough just a few times to bring it together. Remember, less is more when it comes to kneading scone dough.
– Shape into a Disk: Form the dough into a disk approximately 1-1.5 inches thick. This thickness helps ensure an even bake and allows for a lovely rise.
How to Achieve Uniform Thickness for Even Baking
Uniformity is key to ensuring all scones bake at the same rate. Here’s how you can achieve this:
– Use a Rolling Pin with Guides: If available, use a rolling pin with thickness guides to help maintain an even thickness.
– Flatten Gently: When shaping, flatten the dough evenly using your palms, turning the disk occasionally to maintain a round shape.
– Check Thickness Consistently: Use a ruler or your fingers to check that the thickness remains consistent across the disk.
Cutting the Scones: Creating the Signature Shape
Using the Right Tools for Cutting
To achieve the classic scone shape, use the appropriate tools:
– Sharp Knife or Pastry Cutter: For a traditional triangular shape, a sharp knife works well. For round scones, use a biscuit cutter. Ensure the cutter is sharp to make clean cuts.
– Floured Surface: Lightly flour your cutting tool to prevent sticking and ensure clean cuts.
Spacing Considerations for Baking
When placing your cut scones on the baking sheet, spacing is important:
– Leave Room for Expansion: Arrange the scones a few inches apart to allow for spreading during baking.
– Align for Aesthetic Appeal: If you’re going for a rustic look, you can position them closely together, but for a more polished appearance, give them some space.
Brushing and Sprinkling: The Finishing Touches
Why Brushing with Heavy Cream Matters
Brushing the top of your scones with heavy cream before baking serves several purposes:
– Creates a Golden Brown Crust: The fat in the cream helps the scones achieve a beautiful golden-brown color as they bake.
– Enhances Flavor: The richness of the cream adds an extra layer of flavor, making your scones even more delectable.
The Role of Coarse Sugar in Enhancing Texture and Flavor
Sprinkling coarse sugar on top of your scones is not just for aesthetics. Here’s why it matters:
– Adds Crunch: Coarse sugar provides a delightful crunch that contrasts beautifully with the soft interior of the scone.
– Enhances Sweetness: It also adds a touch of sweetness that complements the apple and cinnamon flavors without overpowering them.
Baking the Scones: Timing is Everything
Understanding the Importance of Baking Time
Getting the baking time just right is essential for achieving the perfect scone. Here are some tips:
– Preheat Your Oven: Always preheat your oven to ensure the scones begin baking immediately upon entering. This helps with rising and texture.
– Set a Timer: Start with the recommended baking time, usually around 15-20 minutes, but keep an eye on them during the last few minutes.
Visual Cues for Determining Doneness
To recognize when your scones are done baking, look for these visual cues:
– Golden Brown Tops: The tops should be a rich golden brown.
– Firm to the Touch: Gently press the top of a scone; if it springs back, it is likely done.
– Check the Bottoms: The bottoms should also be lightly browned, indicating they are cooked through.
Cooling and Serving: The Final Steps
Best Practices for Cooling Scones
Once baked, cooling your scones properly is essential:
– Cool on a Wire Rack: Transfer the scones to a wire rack to cool. This allows air to circulate and prevents them from becoming soggy on the bottom.
– Serve Warm: Scones are best enjoyed warm, so consider serving them shortly after cooling.
Suggestions for Serving and Pairing Options
To enhance your scone experience, consider the following serving suggestions:
– Spread with Butter: A pat of butter can add richness and flavor.
– Pair with Jam or Cream: Serve with apple butter, cinnamon spread, or clotted cream for an indulgent treat.
– Beverage Pairings: Enjoy with a cup of tea or coffee, which complements the sweet and spiced flavors beautifully.
Tips for Storing and Reheating
How to Store Scones for Maximum Freshness
For optimal freshness, follow these storage tips:
– Cool Completely: Ensure scones are completely cool before storing to prevent moisture buildup.
– Use an Airtight Container: Store in an airtight container at room temperature for up to 2 days. For longer storage, consider freezing.
Best Methods for Reheating Scones Without Losing Texture
To bring back the delightful texture of your scones when reheating:
– Oven Method: Preheat your oven to 350°F (175°C). Place scones on a baking sheet and warm for about 5-10 minutes until heated through.
– Microwave Method: For a quick option, place a scone on a microwave-safe plate and heat for 10-15 seconds. Be cautious not to overheat, as this can lead to a tough texture.
Conclusion
Heavenly Apple Cinnamon Scones are not just a treat; they are a celebration of flavors that can brighten any day. With this detailed guide, you can confidently bake these delightful scones, impressing family and friends alike. Whether enjoyed fresh out of the oven or as a delightful snack later on, these scones will surely become a favorite in your home. Embrace the joy of baking and savor the deliciousness that follows!


