
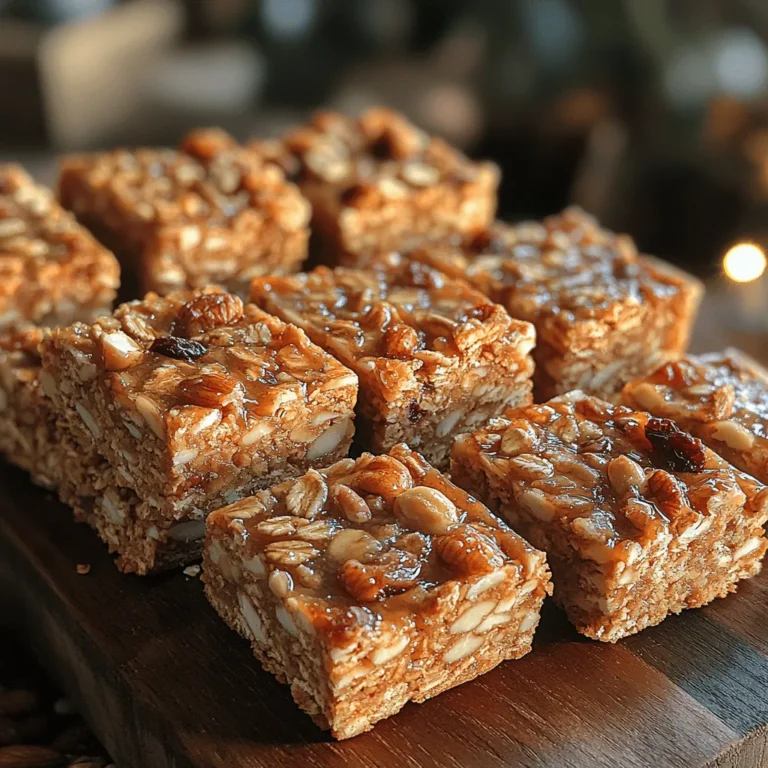
Honey Nut Bliss Granola Bars: A Deliciously Nutritious Snack
In today’s fast-paced world, finding healthy snack options that are both delicious and satisfying can be a challenge. Enter the homemade granola bar—an ideal solution for those seeking a nutritious treat that can be tailored to fit individual preferences. Among the myriad of recipes available, Honey Nut Bliss Granola Bars stand out for their delightful flavor and wholesome ingredients. These bars not only provide a delectable way to indulge your sweet tooth but are also packed with nutrients that can fuel your body throughout the day.
The Allure of Homemade Granola Bars
Granola bars have gained immense popularity over the years, particularly among health-conscious consumers. Originally, the concept of granola dates back to the late 19th century, with granola being made from a mixture of oats, nuts, and sweeteners. However, it was not until the 1970s that granola bars as we know them today began to emerge, capturing the attention of those seeking convenient and nutritious snacks.
While store-bought granola bars often boast convenience and variety, they can also come with a host of ingredients that may include added sugars, preservatives, and artificial flavors. In contrast, making granola bars at home allows you to take control of the ingredients, ensuring that your snacks are not only wholesome but tailored to your specific dietary needs and taste preferences.
The Joy of Customization
One of the standout features of these Honey Nut Bliss Granola Bars is their versatility. The base recipe can be easily modified to incorporate your favorite nuts, seeds, and dried fruits, or even to cater to dietary restrictions such as gluten-free or nut-free options. This not only makes them an excellent choice for families with diverse tastes but also allows for experimentation in the kitchen, leading to personalized creations that everyone can enjoy.
The Initial Steps to Crafting Your Granola Bars
Creating your own Honey Nut Bliss Granola Bars is a straightforward process that begins with gathering the right ingredients. Here’s what you’ll need to get started:
1. Old-fashioned Rolled Oats: The foundation of any great granola bar, these oats provide a hearty base that contributes to both texture and flavor.
2. Mixed Nuts: A blend of your favorite nuts adds crunch, healthy fats, and protein. Consider using almonds, walnuts, or pecans for a satisfying variety.
3. Sunflower Seeds: These seeds contribute an additional layer of crunch and are packed with nutrients, including vitamins E and B6, magnesium, and antioxidants.
4. Sweeteners: For the perfect balance of flavor, you’ll need a natural sweetener. Honey is a fantastic choice for its rich taste and health benefits, but you can also substitute maple syrup if you prefer.
5. Nut Butters: Almond butter or peanut butter helps bind the ingredients together while also providing a source of protein and healthy fats.
6. Flavor Enhancers: A splash of vanilla extract and a sprinkle of ground cinnamon can elevate the flavor profile of your granola bars, making them even more enjoyable.
Now that you have your ingredients ready, you can begin the process of making your Honey Nut Bliss Granola Bars.
Step-by-Step Process
1. Preheat Your Oven: Start by preheating your oven to 350°F (175°C). This ensures that your granola bars will bake evenly and achieve the perfect texture.
2. Mix the Dry Ingredients: In a large mixing bowl, combine the old-fashioned rolled oats, mixed nuts, and sunflower seeds. This dry mixture will form the bulk of your granola bars, providing both structure and nutrition.
3. Prepare the Wet Mixture: In a separate bowl, mix together your chosen sweetener (honey or maple syrup) with the nut butter. This combination should be blended until smooth, ensuring that the sweetener and nut butter are evenly incorporated.
4. Combine Wet and Dry Ingredients: Pour the wet mixture over the dry ingredients, stirring thoroughly until everything is well combined. You want to ensure that the oats and nuts are evenly coated with the sweet mixture, as this will help the bars hold together during baking.
5. Press into a Baking Dish: Line an 8×8 inch baking dish with parchment paper for easy removal. Transfer the granola mixture into the dish, pressing it down firmly with the back of a spatula or your hands. The more compact the mixture, the better your bars will hold together once baked.
6. Bake: Place the baking dish in the preheated oven and bake for about 20-25 minutes, or until the edges are golden brown. Keep an eye on the granola bars to prevent over-baking, as this can lead to a dry texture.
Once you’ve completed these initial steps, your Honey Nut Bliss Granola Bars will be well on their way to being a delicious and nutritious snack. In the upcoming sections of this article, we’ll delve deeper into the health benefits of each ingredient, provide tips for customization, and discuss the best ways to store your homemade granola bars to keep them fresh and flavorful. Stay tuned as we explore this delightful recipe in further detail.
Step-by-Step Instructions
Creating your own Honey Nut Bliss Granola Bars is a delightful process that combines simple ingredients with a few expert techniques. Follow this detailed guide to ensure you achieve the perfect batch.
Preparing the Baking Pan
Before diving into mixing your ingredients, preheat your oven to 350°F (175°C) and prepare your baking pan. Line an 8-inch square baking dish with parchment paper, allowing some overhang on the sides. This step is crucial as it ensures easy removal of the bars once they are set. The parchment paper prevents sticking and makes cleanup a breeze. If you don’t have parchment paper, you can lightly grease the pan with cooking spray or oil, but parchment is recommended for the best results.
Toasting Oats and Nuts
Next, it’s time to toast your oats and nuts, which enhances their flavor and gives your granola bars a wonderful crunch. Spread the rolled oats and chopped nuts (such as almonds and walnuts) evenly on a baking sheet and place them in the preheated oven. Toast them for about 10 minutes, stirring halfway through to ensure even browning. Keep an eye on them, as they can quickly go from perfectly toasted to burnt. This step not only amplifies the nutty flavor but also improves the texture of your bars.
Combining Wet Ingredients
While your oats and nuts are toasting, you can prepare the wet ingredients. In a medium saucepan over low heat, combine the honey, almond butter, and vanilla extract. Stir continuously until the mixture is smooth and well-combined. This usually takes about 3-5 minutes. The key here is to achieve a pourable consistency without overheating the mixture, as this can change the texture of the almond butter and honey. Once melted, remove from heat and set aside to cool slightly.
Mixing Dry Ingredients
In a large mixing bowl, combine the toasted oats, nuts, and any additional dry ingredients such as salt and cinnamon. Stir well to ensure everything is evenly distributed. This step ensures that each bite of your granola bars will be packed with flavor and texture. If you’re adding any seeds, such as pumpkin or sunflower seeds, now is the time to include them in the mix.
Combining Mixtures
Once your wet mixture has cooled slightly, pour it over the dry ingredients. Use a spatula or wooden spoon to mix everything together thoroughly. It’s important to ensure that all the dry ingredients are coated with the wet mixture for optimal flavor and texture. Don’t be afraid to get in there and mix well; this will help the bars hold together better once set.
Pressing into the Pan
Transfer the mixture into your prepared baking pan. With a spatula, press the mixture firmly and evenly into the pan. Use your hands to compact the mixture as tightly as possible. This is a critical step; the more firmly you pack the mixture, the better your bars will hold together once they cool. Aim for an even thickness across the pan.
Chilling and Setting
Now comes the hardest part—patience. Place the pan in the refrigerator for at least 1-2 hours to allow the bars to set properly. Chilling helps the ingredients bind together and makes cutting easier. If you skip this step, you may end up with crumbly bars that don’t hold their shape.
Cutting and Storing
Once your granola bars are set, lift them out of the pan using the parchment paper overhang. Place them on a cutting board and use a sharp knife to cut them into bars or squares, depending on your preference. Store your Honey Nut Bliss Granola Bars in an airtight container at room temperature for up to a week or in the refrigerator for longer freshness. For extended storage, you can freeze individual bars wrapped in plastic wrap and placed in a freezer-safe bag for up to three months.
Customization Options
One of the best things about homemade granola bars is the ability to customize them to suit your taste and dietary preferences.
Substituting Nuts and Seeds
Feel free to swap out the nuts and seeds based on your preferences or what you have on hand. Pecans, hazelnuts, or even peanuts can work well in this recipe. If you have nut allergies, consider using seeds like chia, flaxseeds, or sunflower seeds as a substitute.
Using Alternative Sweeteners
For those looking to experiment, you can replace honey with other sweeteners. Maple syrup or agave nectar can provide a different flavor profile while still ensuring the bars stick together. If you prefer a sugar-free option, consider using date syrup or stevia.
Adding Spices and Extracts
Enhance the flavor of your granola bars with spices such as cinnamon, nutmeg, or even a pinch of sea salt. A splash of almond or coconut extract can also transform the flavor profile, giving your bars a unique twist.
Exploring Other Mix-Ins
Consider adding additional mix-ins to make your granola bars even more exciting. Dried fruits like cranberries, raisins, or apricots can add a chewy texture and natural sweetness. You can also mix in coconut flakes for added tropical flavor or protein powder for an extra boost, making these bars a great pre-workout snack.
Serving Ideas and Pairings
These Honey Nut Bliss Granola Bars are incredibly versatile and can be enjoyed in various ways.
Pairing with Yogurt or Smoothie Bowls
Crush a bar and sprinkle it over your favorite yogurt or smoothie bowl for added crunch and nutrition. The combination of creamy yogurt with the nutty granola bars creates a satisfying breakfast or snack.
Using as a Topping for Breakfast Dishes
You can also use these bars crumbled as a topping for oatmeal or chia seed pudding. The bars will provide a delightful contrast in texture, taking your breakfast to the next level.
Ideal for On-the-Go Snacking or Meal Prep
These granola bars are perfect for busy lifestyles. Pack them in your bag for on-the-go snacking, or include them in your meal prep for a nutritious, energy-boosting snack throughout the week. Their portability makes them an excellent choice for hiking, road trips, or even just a quick grab-and-go breakfast.
Conclusion
These Honey Nut Bliss Granola Bars encapsulate the essence of homemade snacks—delicious, nutritious, and easy to customize. With the right ingredients and a straightforward process, you can create a healthy alternative to store-bought options, ensuring you know exactly what goes into your food. As you experiment with different flavors and ingredients, you’ll find that these bars not only satisfy your cravings but also contribute to a balanced diet. Enjoy the wholesome goodness of your homemade granola bars and the peace of mind that comes with knowing exactly what you’re eating.
